Printing from Notepad might seem simple, but many users still struggle with getting the format, margins, or printer setup right. Whether you’re printing a text document, code file, or configuration log — knowing how to print correctly can save you time and paper.
This guide explains how to print documents from Notepad, how to adjust print settings, and how to fix common printing issues in Windows.
Why Print from Notepad?
Notepad is a lightweight text editor used for quick notes, coding, and documentation. Sometimes, you may want to print a Notepad file for:
- Sharing notes or instructions in meetings
- Submitting code snippets or assignments
- Keeping printed logs or configuration details
- Storing written drafts or ideas on paper
Even though Notepad doesn’t support rich formatting like Word, it allows clean and straightforward printing — ideal for text-based content.
Understanding How Notepad Printing Works
When you print a file from Notepad, Windows sends your text document directly to the printer through the system’s Print Spooler service.
Here’s what happens behind the scenes:
- You press Ctrl + P or click File → Print.
- Notepad opens the Windows Print dialog box.
- You select your printer, adjust settings (like orientation or copies).
- Windows converts your text into a printable format.
- The printer receives it and begins printing.
Because Notepad uses plain text, your printout won’t include colors, bold fonts, or other formatting — just clean, readable text.
Step-by-Step: How to Print from Notepad
Let’s go through the complete process step-by-step 👇
Step 1: Open Your File in Notepad
- Launch Notepad from the Start menu or by pressing Win + R → type “notepad” → Enter.
- Open your desired text file by clicking File → Open and selecting it.
Step 2: Review Your Content
Make sure your text looks correct — check for unnecessary spaces, lines, or missing content.
You can use Word Wrap (Alt + O + W) to fit text within the Notepad window, but remember:
Word Wrap affects on-screen viewing only, not printed layout.
Step 3: Open the Print Dialog
There are two ways to open the print menu:
- Shortcut: Press Ctrl + P
- Menu: Click File → Print…
This will open the standard Windows Print Dialog Box.
Step 4: Choose Your Printer
From the list of available printers, choose:
- Your default printer, or
- Microsoft Print to PDF (if you want to save it as a PDF instead of printing)
You can also select OneNote or Fax if installed.
Step 5: Adjust Printer Settings
Click the Preferences or Properties button next to your printer name to customize:
- Page Orientation: Portrait (vertical) or Landscape (horizontal)
- Paper Size: A4, Letter, or Custom
- Margins: Default or custom margins
- Copies: Number of copies to print
💡 Tip: If you’re printing long code or tables, choose Landscape for better readability.
Step 6: Preview Before Printing
Notepad doesn’t have a built-in print preview option, but you can use Print Setup to review settings.
Go to:
File → Page Setup
Here you can modify:
- Paper size
- Margins
- Header and Footer text
- Page orientation
Editing Headers and Footers
Notepad allows you to include headers and footers on each printed page using special symbols.
Here’s how:
- Open File → Page Setup
- In the Header or Footer box, enter text or use these placeholders:
| Symbol | Meaning |
|---|---|
&f | File name |
&d | Date |
&t | Time |
&p | Page number |
&l | Left align |
&r | Right align |
&c | Center align |
Example:
- Header:
&l&f→ Prints the file name on the top-left - Footer:
Page &p→ Prints page numbers
Click OK to save your setup.
Step 7: Print Your File
Once all settings are ready:
- Click Print, or
- Press Enter after choosing your printer.
Your printer will start processing the file and print each page in plain text format.
How to Save as PDF Instead of Printing
If you don’t have a physical printer or want to keep a soft copy, Notepad can print to a PDF file using the “Microsoft Print to PDF” option.
Steps:
- Open your text file in Notepad.
- Press Ctrl + P.
- Select Microsoft Print to PDF as the printer.
- Click Print.
- Choose where to save the file (e.g.,
Desktop), give it a name, and click Save.
You now have a .pdf version of your Notepad file — perfect for sharing or archiving.
Fixing Common Printing Problems in Notepad
If printing doesn’t work properly, here’s how to fix common issues:
🧩 Problem 1: Printer Not Showing Up
- Make sure your printer is connected and turned on.
- Go to Settings → Bluetooth & Devices → Printers & Scanners.
- Click Add a printer or scanner if missing.
🧩 Problem 2: Blank Pages Printing
- Check if the text is actually visible in Notepad (no empty lines).
- Ensure the correct paper size and orientation in Page Setup.
🧩 Problem 3: Text Too Small or Cut Off
- Go to File → Page Setup → increase margins or change orientation.
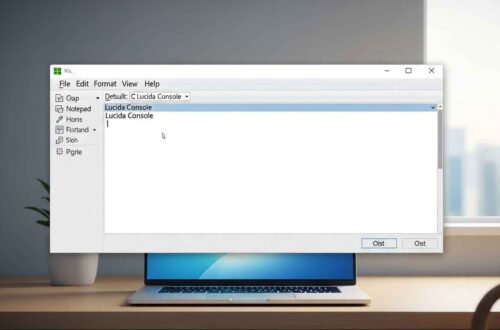
- Use a monospace font like Lucida Console or Consolas for clarity.
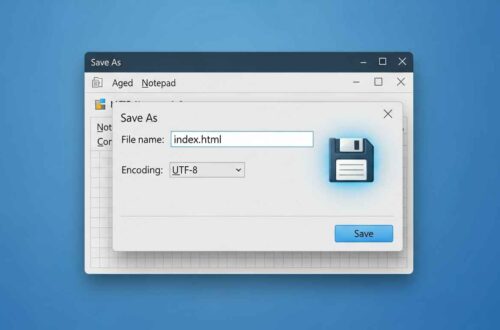
🧩 Problem 4: Encoding Issues (Strange Characters)
If non-English or special characters print incorrectly:
- Save your file with UTF-8 encoding.
- Go to File → Save As → Encoding → UTF-8.
🧩 Problem 5: Printer Not Responding
- Restart the Print Spooler service.
- Press Win + R, type
services.msc, find Print Spooler, right-click → Restart.
- Press Win + R, type
Tips for Professional-Looking Prints
Even though Notepad is basic, you can make your prints cleaner with a few tweaks:
- Use monospaced fonts (Consolas, Courier New) for alignment.
- Adjust margins to fit more text per page.
- Add headers and footers with file names and page numbers.
- Choose Landscape for long lines or code.
- Save as PDF if sharing digitally.
Bonus: Printing Code Files
When printing code files (like .html, .css, .bat, or .py):
- Set Word Wrap OFF so code lines don’t break.
- Use Consolas or Courier New font.
- Consider exporting from Notepad++ for syntax-colored printing if readability is important.
You can get Notepad++ free from:
👉 https://notepad-plus-plus.org/
Printing via Command Line (Advanced Users)
You can even print directly using Command Prompt without opening Notepad.
Example Command:
notepad /p "C:\Users\YourName\Documents\notes.txt"
This command sends the file directly to your default printer.
It’s a great shortcut if you print multiple logs or files frequently.
Final Thoughts
Printing from Notepad is simple but extremely useful — especially when you need quick hard copies of plain text, notes, or code files.
With the right page setup, font adjustments, and encoding, you can ensure every printout looks clean and readable.
And if you don’t have a physical printer, you can still use the Print to PDF option to store your documents digitally.
So next time you want to print from Notepad, remember:
A few clicks are all it takes to turn your plain text into a perfectly formatted printed document.